
There was a time when my world of coffee was confined to instant and filter. For a brief moment, as I entered corporate work in my 20’s, getting coffee from an automatic machine was exciting. And as
Then I visited Italy! For the first time I experienced coffee as tasting incredible and I was seduced.
Subsequent visits to Europe introduced me to the magical device they call a Moka pot. I was intrigued. You set the whole thing up on the stove and coffee magically appears in the top section after a few minutes. How marvellous.
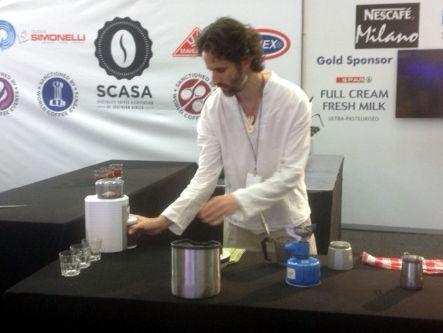
I was determined to master the Moka and create a home-brewed flavour experience as close as possible to my initial experience tasting coffee in Italy. It became my daily meditation practice, with dedicated and persistent attempts each morning to obtain the perfect brew.
The appeal for me of the Moka, as with so many of my dabblings, is in its simplicity. That with care, attention and some basic equipment one can create a remarkable experience pretty much anywhere. What luxury!
Here are some tips I’ve discovered along the way:
- Brewing with a Moka to obtain extraordinary flavour is an art. This means it requires focused attention – hens it being a meditation.
- Use the correct size pot for the number of coffees you are making – trying to make one coffee in a two cup coffee pot just doesn’t work with the techniques described here.
- If possible, grind your own coffee. Freshly ground coffee is always better. A burr grinder is better than a blade ‘chopper’ as you’ll have some control over the fineness and consistency of the grind. My preference is to use a hand grinder because then it’s as portable as the Moka pot and perfect for camping.
- You want to create pressure during the brewing process. The reason (IMHO) is that greater pressure in the Moka pot creates more of an expresso style coffee that a filter/percolated style. Ways to increase pressure include one or a combination of these:
- Grind the beans as fine as you can get them without it being soo fine that the water can’t get through.
- Tamp the grounds, packing them into the basket tightly.
- Use slightly more grounds that less (remembering that they will swell in the basket during the extraction so don’t overfill the basket) – I work on between 7 and 8 grams for a single shot.
- Grind the beans as fine as you can get them without it being soo fine that the water can’t get through.
- I prefer to boil the water the water first. Starting with hot water speeds up the process and the hot water can be used to preheat your cup.
- Use a low to medium heat.
Gas works best for consistent heat. The trick here (along with the next tip) is to control the amount of time taken to extract flavour from the coffee grounds. It’s unlikely it’ll ever be too slow, but if it’s too fast you will miss out on some of the yummy flavours. - Master tip! Leave the lid open so you can watch the coffee flow out. As a rule-of-thumb, once the colour of the liquid becomes pale, plunge the pot into cool water to quickly stop the flow. If you don’t do this the steam that comes at the end is likely to add a burnt flavour to your coffee.
If the flow of coffee into the top section of your Moka begins with a foamy cascade of tiny golden bubbles followed by an almost syrupy-thick, dark liquid you’ve hit Moka gold!
Finding the correct flow speed and brewing time is a matter of experimentation and taste preference and depends on the pressure created by the grounds and heating temperature. And it’ll be different for different coffees beans.
As a guide, for a single shot I use 7 grams of beans to get 35 grams of espresso (give or take a fraction).
I prefer drinking cappuccinos so for the milk I pour about half a cup of heated milk into a single cup french press (plunger), plunging enthusiastically until the milk becomes thick, smooth and sweet. At this point there usually an eager child wanting to pour espresso art (and claim any remaining milk foam).